Configuring Splunk in Okta (Part 1)
Author: Jamie Turbill
Release Date: 13/07/2021
It’s no secret that Okta has a huge library of pre-built integrations that you can use in the Okta Integration Network (OIN). In fact, as I’m typing this there are over 6000 available! Perhaps it’s no surprise then that both Splunk Cloud and Splunk Enterprise are already available and are fully Okta Verified.
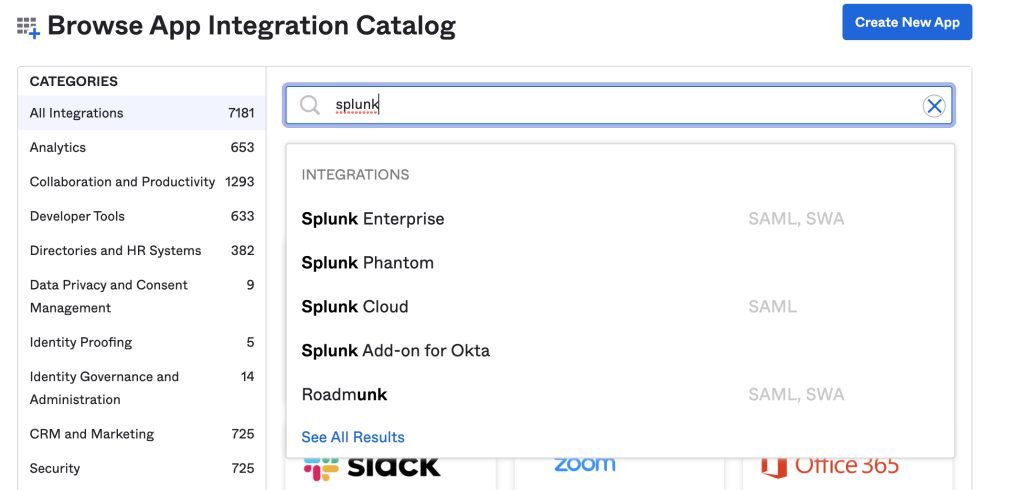
To set up Splunk and Okta, simply add the application to your Okta tenant. Go to your Okta admin portal and click on Applications > Browse App Catalog and simply search for “Splunk”.
We’ll ignore the Splunk Add-on for Okta here, this will be discussed in the next part to this blog. Both Splunk Cloud and Splunk Enterprise are available and support SAML. Because the steps are virtually the same, we’ll focus on Splunk Enterprise today. You can repeat most of the steps below for Splunk Cloud, but you must ensure that SAML is enabled on your Splunk Cloud instance first! (Contact Splunk Support to enable)
Additionally, I am using version 8.2.1 of Splunk but the steps for SAML should be similar on later versions including Splunk 9.0

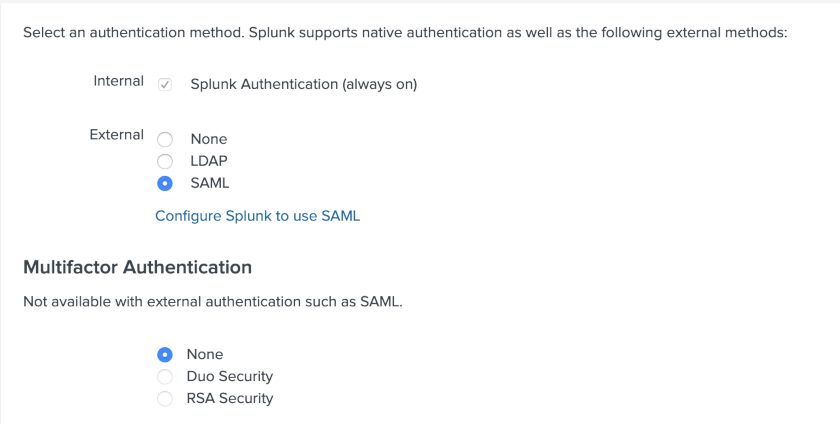
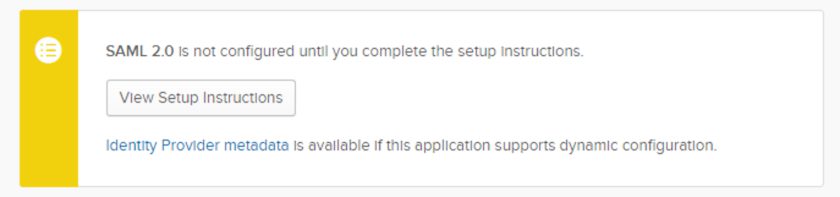
When you click “Next”, you will see many options for SAML 2.0. Ignore these for now and just click on “Done” (we’ll look at this later). Go to your Splunk instance and head to Settings > Authentication Method. Choose SAML and then click on the link to configure SAML:
A pop-up will appear. When setting up SAML with any application, metadata needs to be exchanged between the IdP (that’s Okta) and the SP (the application, Splunk). Download Splunk’s SP metadata.

This will download a XML file. Open this XML file in Notepad++ or another suitable text editor.
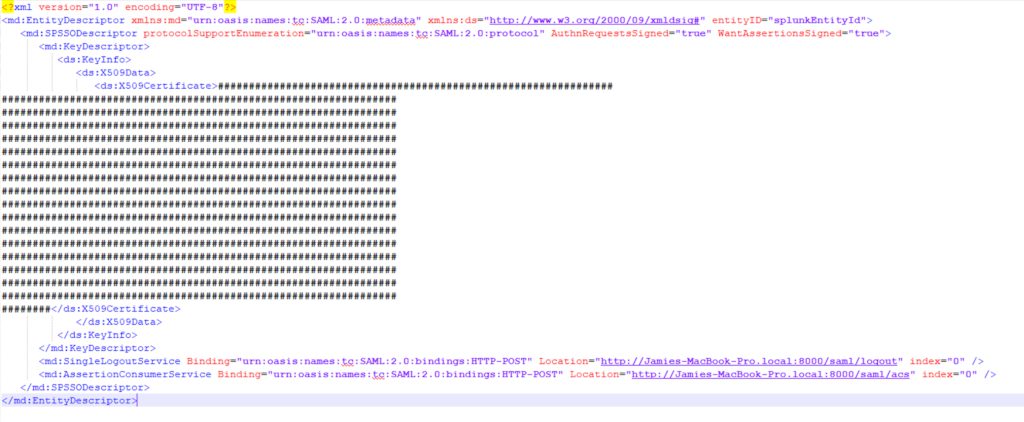
Copy and paste the x509 certificate within this (the string inside the XML tags) to a new text file, prepending and appending -----BEGIN CERTIFICATE----- and -----END CERTIFICATE----- like the below:
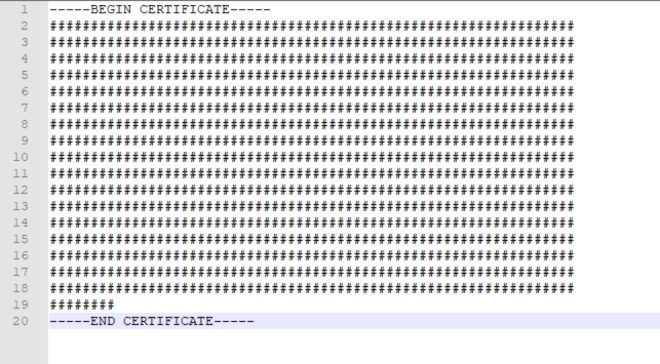
Finally, save the file as splunk.cert
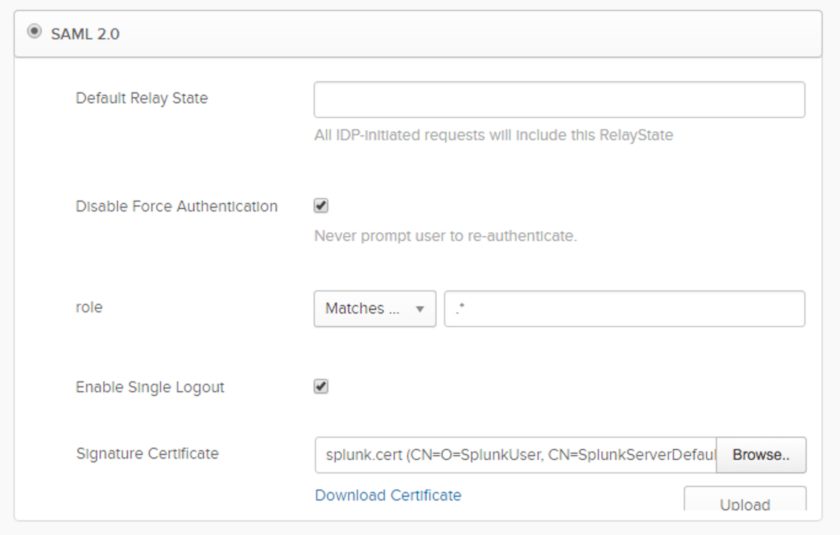
Also configure the “role” setting at the same time. This defines what Okta groups a user is a member of and is passed to Splunk with the SAML authentication request. I’ve set this to “Matches Regex” and the value .* - which means send anything in this case. (we can control what groups Splunk actually uses later, so normally .* is perfectly fine).
Again, this will download a new XML file. In Splunk’s configuration, upload this file by choosing “Select File” for “Metadata XML file”
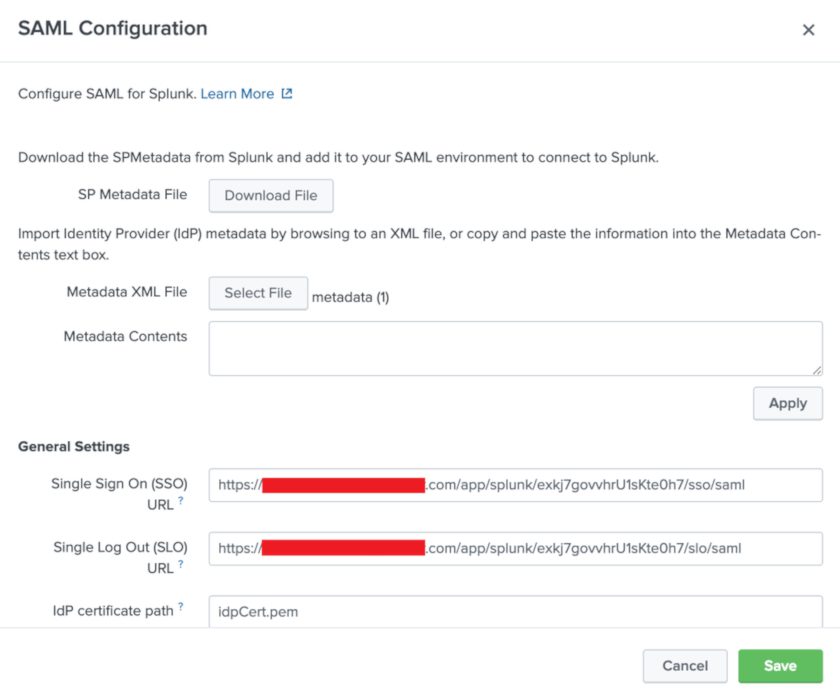
You should notice immediately that Splunk will auto-fill several fields for you at this point. Make a few other tweaks to this:
- Ensure that the “Single Log Out (SLO) URL” is set - set to Okta’s SLO endpoint.
- This URL is the same as the “Single Sign On (SSO) URL” but /sso/saml is replaced to /slo/saml
- Check the option to “Sign AuthnRequest”
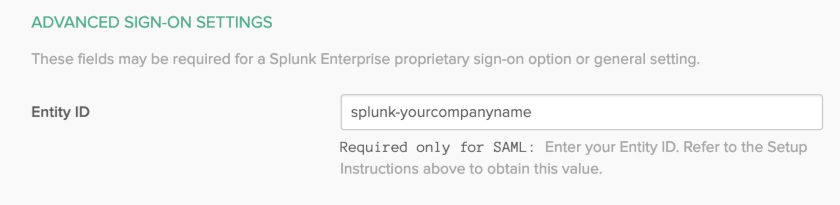
- Entity ID - set this to “splunk-yourcompanyname”
Save the configuration. In Okta, make sure to add the same Entity ID under the Sign-on tab:
And that’s it! SAML setup is complete. You now just need to map your Okta groups to your Splunk roles, which you can do in Splunk once you save the SAML configuration.
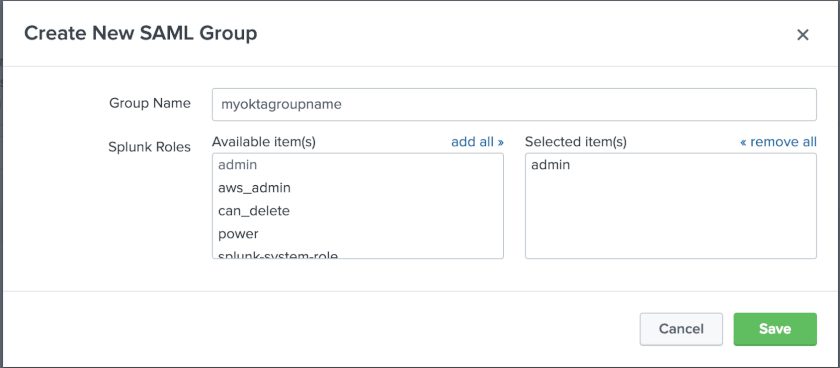
This example sets the Okta group “myoktagroupname” to the Splunk role “admin”. You can add multiple mappings here, and also map multiple Splunk roles to 1 Okta group. Simply assign a user to the app in Okta, and test it out!
In the event something goes wrong, you can always login as a standard Splunk user by going to:
http(s)://:8000/en-GB/account/login?loginType=Splunk
SAML users in Splunk are added/updated at the time of login. A user’s email address and full name are also sent from Okta as SAML attributes and are stored in Splunk.
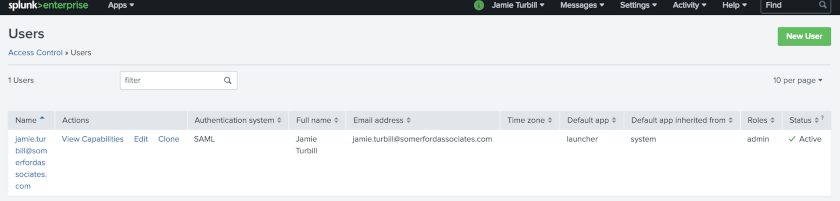
Users can now seamlessly login to Splunk from the Okta portal with their own Splunk accounts, and have their Splunk roles seamlessly mapped from the groups they are in within Okta.
Users do not need to remember a Splunk password ever again!
In Part 2, we will look at how Splunk can enhance the reporting and auditing already available in the Okta platform, using the Splunk add-on for Okta.