


In this blog we are going to talk about how easy it is to configure Threat protection on your web traffic when using Netskope.
The machine I am currently on is a server sitting in AWS and it has absolutely nothing in the way of Threat Protection outside of that which is native to Windows.

To demonstrate, lets go to EICAR and download their malware test file.
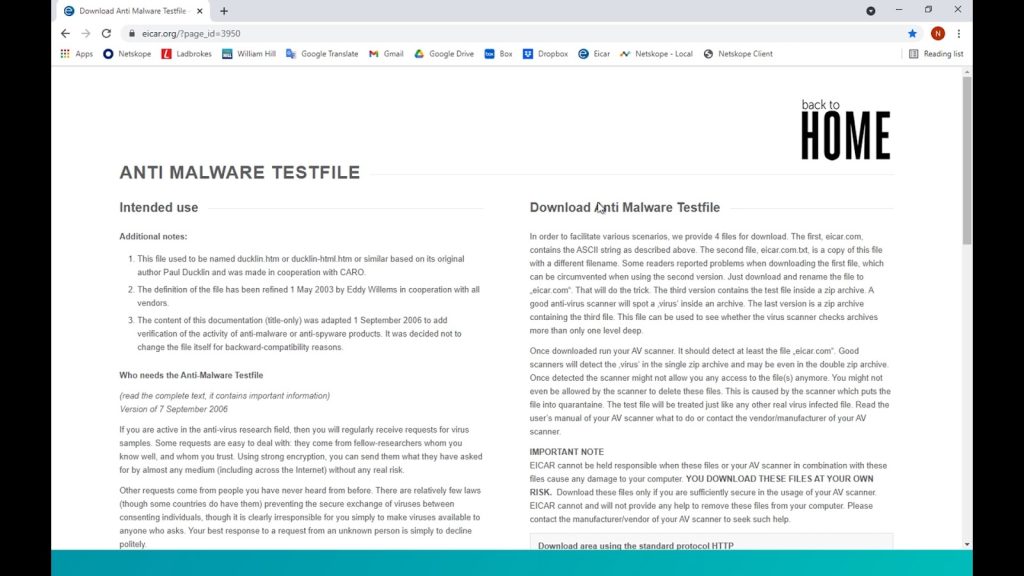
As can be seen, Windows doesn’t allow the download and tells us the file was infected.
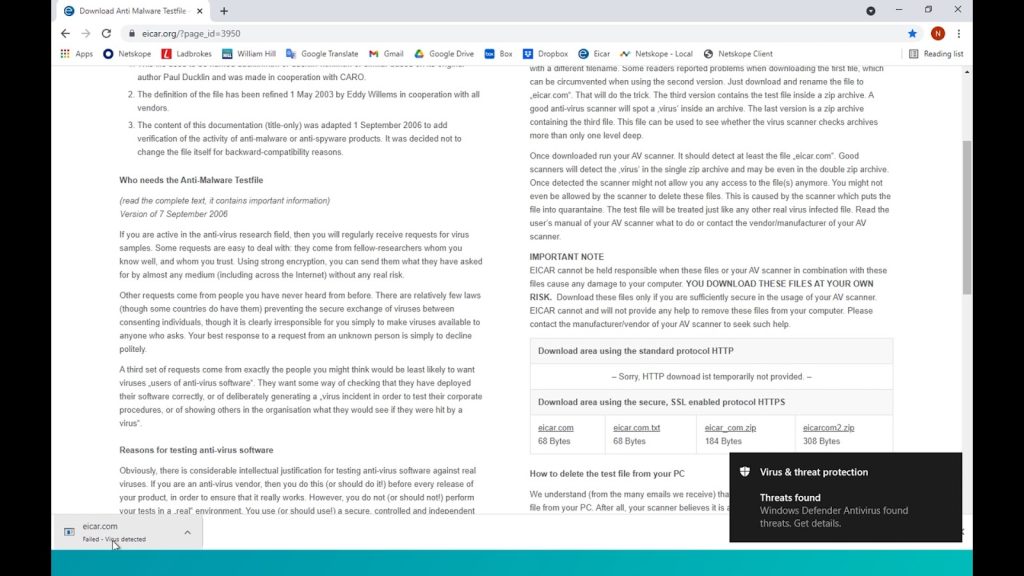
We don’t want it to ever get this far though, we want to stop such a threat at its source as opposed to ever allowing it onto our machine for it to be scanned.
On this machine, we do however have a Netskope tenant installed and when enabled, we can see that it has been configured to steer all of our Web Traffic to our cloud tenant for inspection.
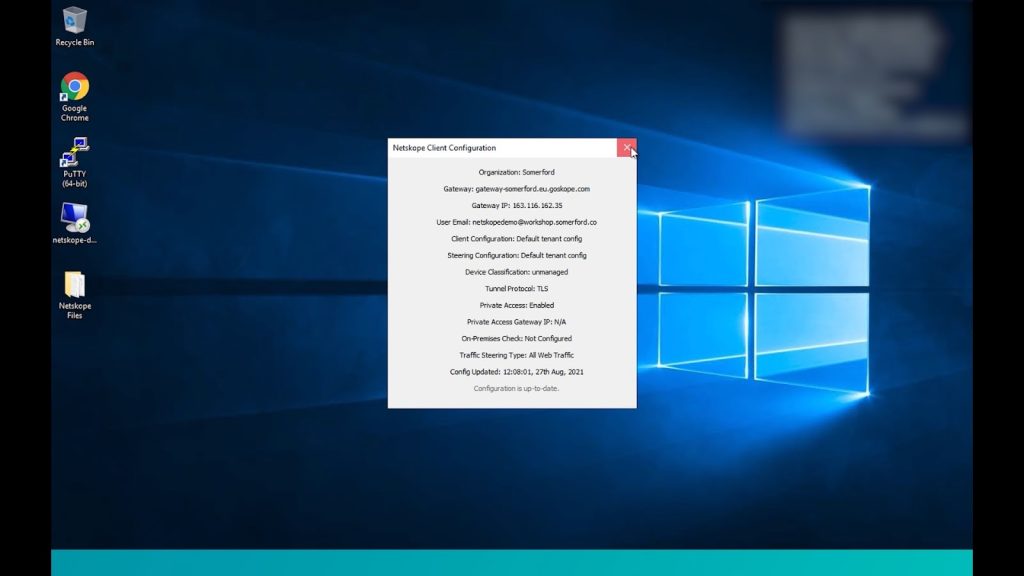
This is important as while most legacy Secure Web Gateways offer some level of threat protection, this is usually done by way of onsite appliances in data centers, our traffic in this instance would have to be on the company network before the protection was applied. When it comes to remote workers and cloud infrastructure, this can be problematic however as Netskope’s tenant is in the cloud, we have protection no matter where we are located.
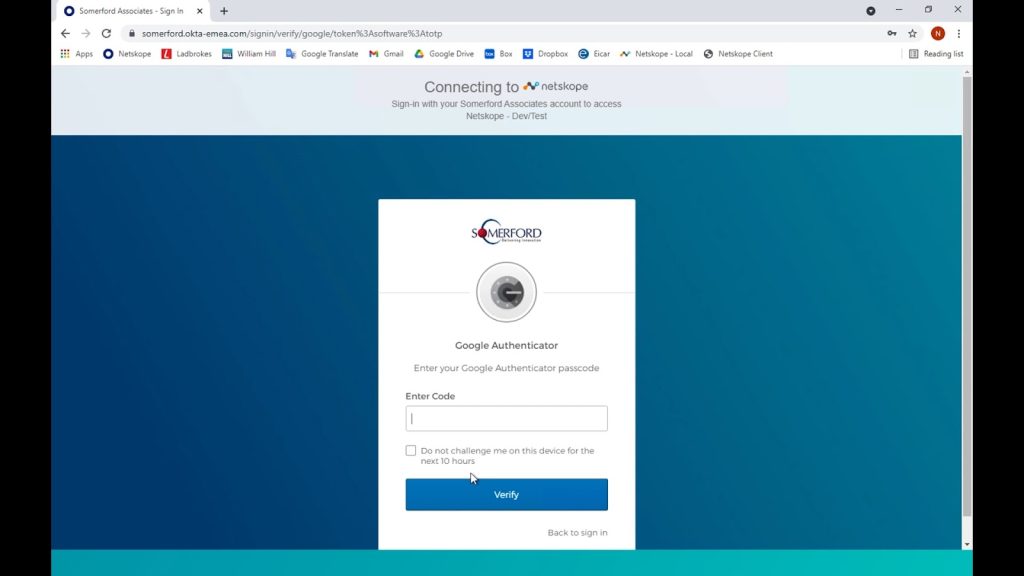
There are no policies applied within this tenant yet so here we log into the Netskope Cloud Tenant directly. As always, since it is a public facing cloud portal, we want to have extra security such as MFA with Okta in this instance.
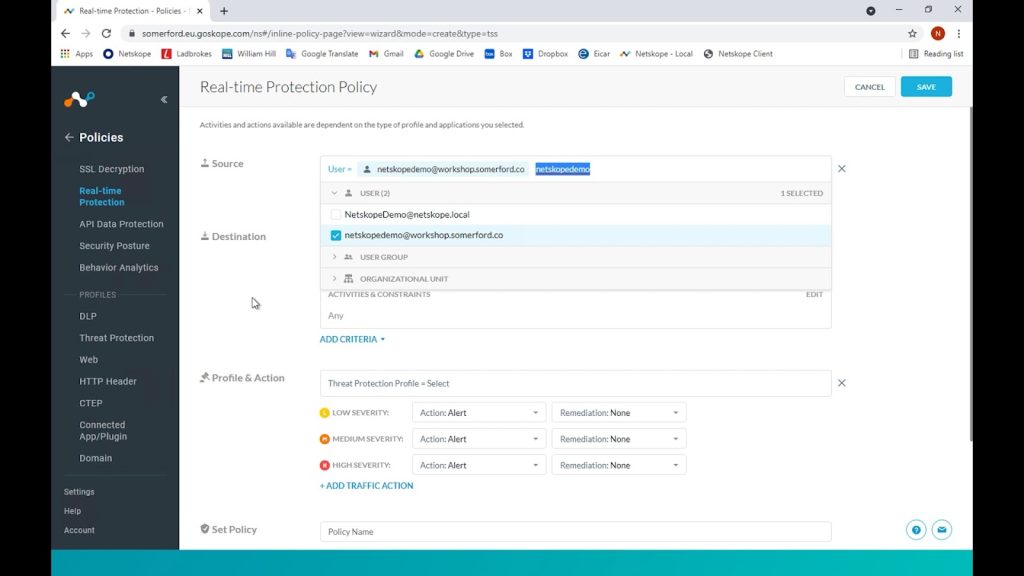
Once logged in, we choose Real Time Protection and we want to create a new Threat Protection Policy.

We can apply this policy to individual users or adopt a more role based approach by choosing groups or organisational units, in this instance we will apply ours to an individual user.
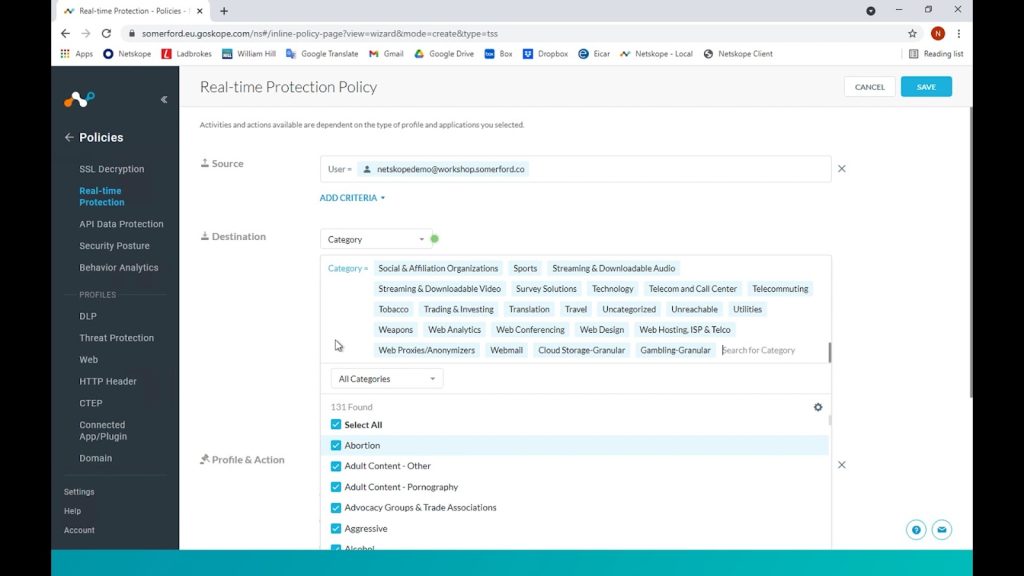
For our destination, we can granularly apply the policy to Cloud Apps and categories but since it is such an important policy, we want it to be applied to every category of web traffic.
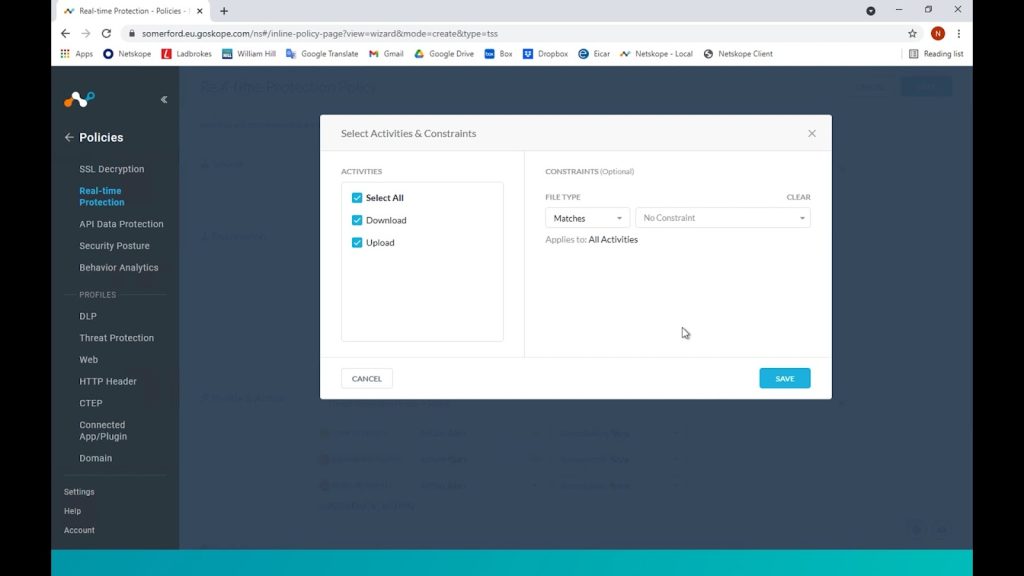
We can choose granular activities too but in this case, we want all uploads and downloads to be checked for threats.
We don’t have any other threat protection profiles configured so we will choose the default Netskope one here that should be noted is updated constantly as new emerging threats are discovered.
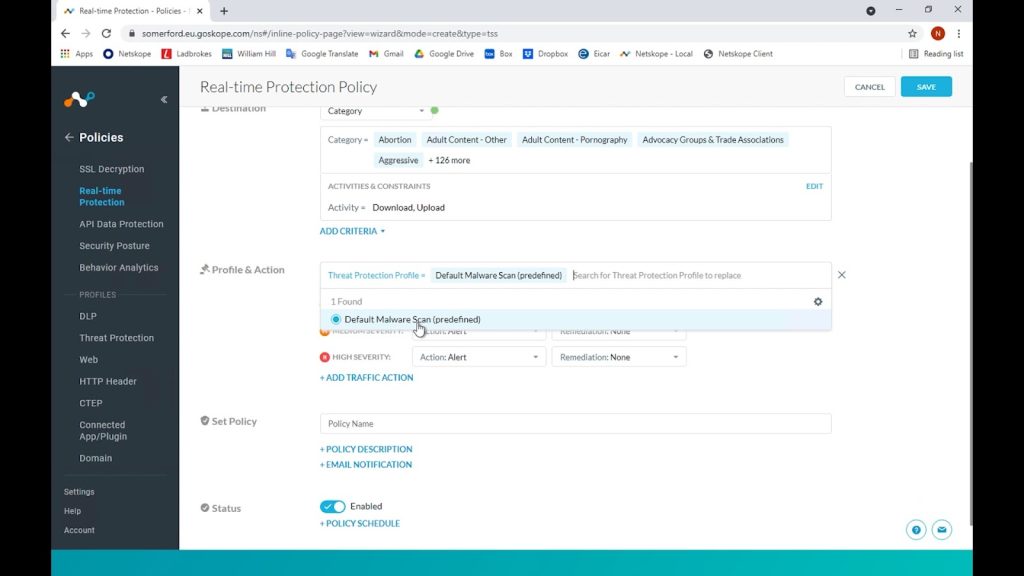
We can configure different granular controls based on perceived threat severity but in this instance we will choose to block for all.
We have also previously created a custom user notification template to better educate our end users for this type of block so we also choose this in our policy.
Lastly, Netskope can be integrated with tools such as Crowdstrike wherein remediation actions can be specified however, this dev tenant does not have this configured so we will leave these options as none.
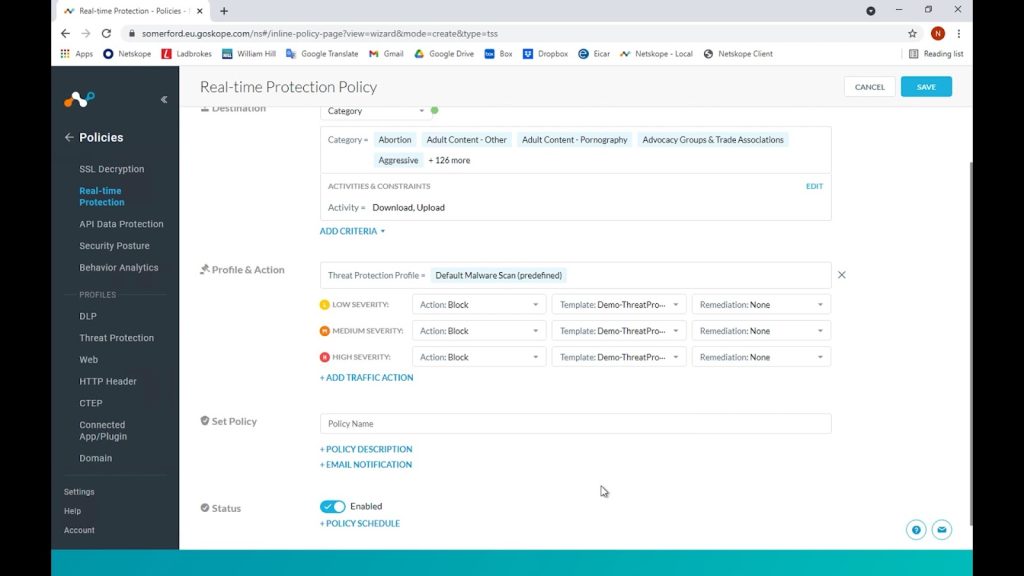
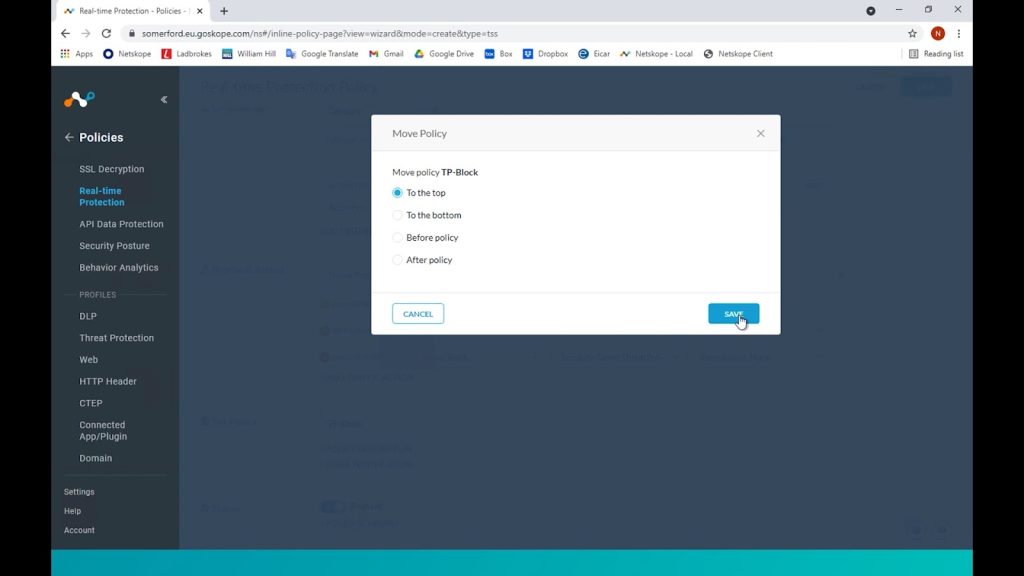
As it is such a critical policy, we want this to be at the very top of the list and then our policy is synced and enacted on all of our end user’s traffic.
Now if we return to the EICAR site shown previously and attempt to download the same malware file as before, we are blocked from doing so, the Netskope cloud tenant has inspected the file, has detected malware contained therein, has blocked us from downloading it and has clearly advised as to what has just happened.
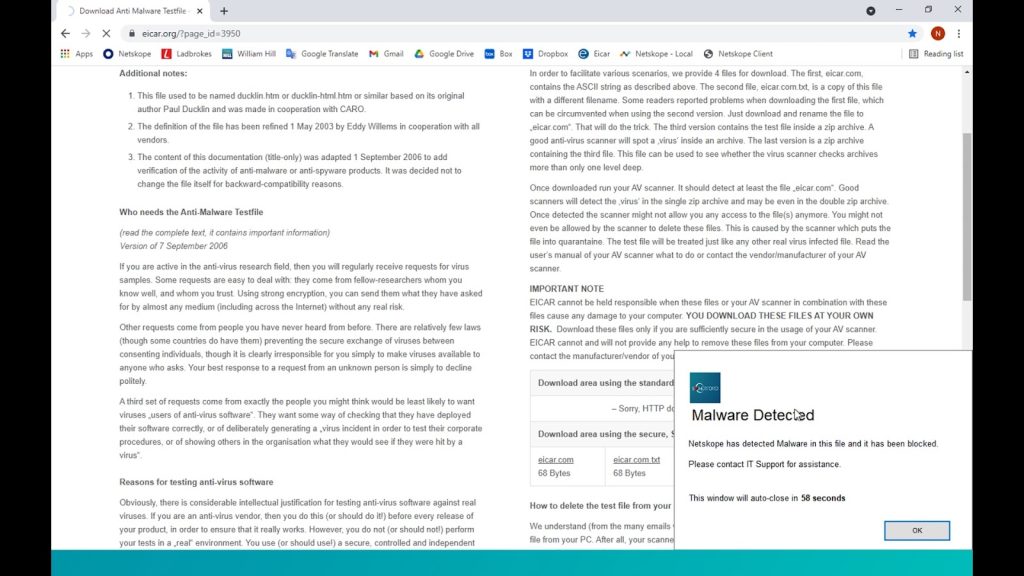
The file has never reached our machine and has been stopped at source, in real time, and we have not had to be on the company network for this to happen hence no matter where in the world we are working from, we now have real time web based threat protection.
If you wish to know more about Netskope and how it can assist your organisation in today’s SASE and Cloud based world then please get in touch with us here.
| Cookie | Duration | Description |
|---|---|---|
| language | 1 month 1 hour | This cookie is used to store the language preference of the user. |
| Cookie | Duration | Description |
|---|---|---|
| ADRUM_BT1 | past | This cookie is used to optimize the visitor experience on the website by detecting errors on the website and share the information to support staff. |
| ADRUM_BTa | past | This cookie is used to optimize the visitor experience on the website by detecting errors on the website and share the information to support staff. |
| Cookie | Duration | Description |
|---|---|---|
| _ga | 2 years | The _ga cookie, installed by Google Analytics, calculates visitor, session and campaign data and also keeps track of site usage for the site's analytics report. The cookie stores information anonymously and assigns a randomly generated number to recognize unique visitors. |
| _gat_gtag_UA_1170872_23 | 1 minute | Set by Google to distinguish users. |
| _gat_gtag_UA_99925054_1 | 1 minute | Set by Google to distinguish users. |
| _gid | 1 day | Installed by Google Analytics, _gid cookie stores information on how visitors use a website, while also creating an analytics report of the website's performance. Some of the data that are collected include the number of visitors, their source, and the pages they visit anonymously. |
| CONSENT | 16 years 2 months 24 days 11 hours 26 minutes | YouTube sets this cookie via embedded youtube-videos and registers anonymous statistical data. |
| vuid | 2 years | Vimeo installs this cookie to collect tracking information by setting a unique ID to embed videos to the website. |
| Cookie | Duration | Description |
|---|---|---|
| IDE | 1 year 24 days | Google DoubleClick IDE cookies are used to store information about how the user uses the website to present them with relevant ads and according to the user profile. |
| test_cookie | 15 minutes | The test_cookie is set by doubleclick.net and is used to determine if the user's browser supports cookies. |
| VISITOR_INFO1_LIVE | 5 months 27 days | A cookie set by YouTube to measure bandwidth that determines whether the user gets the new or old player interface. |
| YSC | session | YSC cookie is set by Youtube and is used to track the views of embedded videos on Youtube pages. |
| yt-remote-connected-devices | never | YouTube sets this cookie to store the video preferences of the user using embedded YouTube video. |
| yt-remote-device-id | never | YouTube sets this cookie to store the video preferences of the user using embedded YouTube video. |
| yt.innertube::nextId | never | This cookie, set by YouTube, registers a unique ID to store data on what videos from YouTube the user has seen. |
| yt.innertube::requests | never | This cookie, set by YouTube, registers a unique ID to store data on what videos from YouTube the user has seen. |
| Cookie | Duration | Description |
|---|---|---|
| cookie-test | past | No description |
| cookielawinfo-checkbox-functional | 1 year | The cookie is set by GDPR cookie consent to record the user consent for the cookies in the category "Functional". |
| guest | 1 month 1 hour | No description available. |
| jcm | past | No description |
| jcmc | past | No description |
| JOTFORM_SESSION | 1 month | No description available. |
| SameSite | past | No description available. |
| theme | 1 month 1 hour | No description available. |
| userReferer | 1 month 1 hour | No description available. |